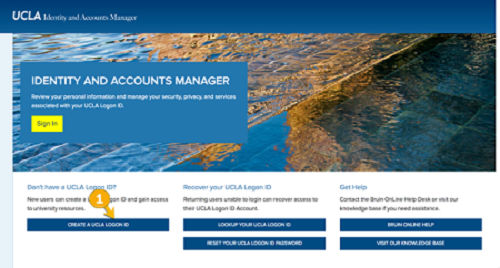
It is easy to create a UCLA Logon ID within the Identity and Accounts Manager “Welcome” screen, even if you do not have a UCLA ID Number (UID). If you need help, contact the IT Support Center.
1. Click Create a UCLA Logon ID.
2. The next screen will show you the terms of service, which provide important information regarding policies, procedures, and responsibilities. This page explains how the University uses your personal information, as well as your responsibility in using the system. You must agree to the terms before receiving access to the system.
- Check the box that says I agree to the Terms of Service.
- Click I agree to the Terms of Use to get started.
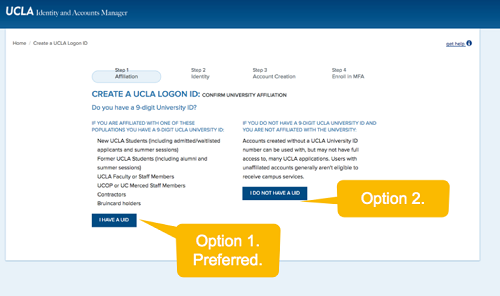
3. Confirm that you are not affiliated with the University by choosing option 2.
4. Fill out the form on the next screen:
- Enter your First Name.
- Enter your Last Name.
- Enter your Date of Birth (DOB).
- Enter your email address.
- Click “Continue.”
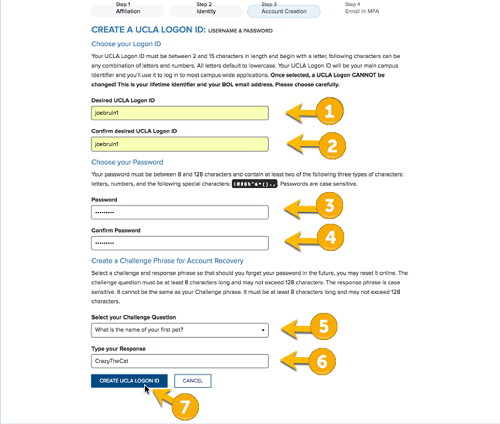
5. On the next screen, create your account:
- Enter your desired UCLA Logon ID.
- Confirm your desired UCLA Logon ID.
- Enter your password.
- Confirm your password.
- Select a challenge question.
- Type your response to the question.
- Click Create UCLA Logon ID.
6. Review your logon details on the next screen and click Confirm. Make sure that the UCLA Logon is exactly what you want. Once it is created, you will not be able to change it.